Creating, Editing and Implementing Forms
There are dozens of reasons you might be wishing you had a form on your website. Maybe you want to collect information about your visitors or maybe you want visitors to be able to submit questions or problems. No matter the reason, forms are instrumental in easily gathering, storing, and sorting collected information. Here we’ll show you how to create forms, integrate them with 3rd party tools, setup conversion tracking, and insert forms on a page or widget.
Overview
There are dozens of reasons you might be wishing you had a form on your website. Maybe you want to collect information about your visitors or maybe you want visitors to be able to submit questions or problems. No matter the reason, forms are instrumental in easily gathering, storing, and sorting collected information. Here we’ll show you how to create forms, integrate them with 3rd party tools, setup conversion tracking, and insert forms on a page or widget.
What is a Form?
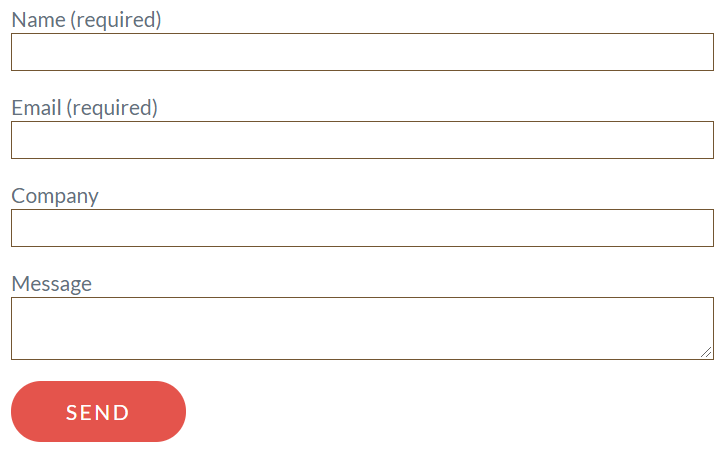
A form is a set of text fields, check boxes, and/or radial buttons for users to fill in or select information and submit using an action button.
Create a Form
There are two ways to create a form.
Either navigate to the left-hand column and select Forms Add Form:

Or navigate to the Form List Page and click the Add Form button in the top let corner:

Form Page
There are three main sections you will have to fill out to build out your forms.
- Basic Options – Build the form, choosing whichever elements you want, and edit the text and placeholders
- Form Options – You can optionally setup where you want form submissions to be emailed to, a success message, Captcha settings, form security, a download option, and a message for users.
- Form Tracking – Setup tracking with Google Event Tracking and URL Parameter Tracking to track detailed engagement with your forms.
Basic Options
Included in Basic Options are:

1. Form Fields
This displays how your form is ordered. You can reorder the fields with up/down arrows or delete the field with the trash can, both located to the right of the field.
2. Edit Form Element
When you click on each field, you will see its corresponding form options on the right. Options vary depending on the type of element, but here are a few constants:
- Label – The name of the field that users see
- Required – Mark a field as required, and it automatically adds a red “(required)” next to the field
- Hidden – If you select this, you will hide this element from users so they can’t see it
- Placeholder – Add example text to the field to help users understand the type of response they should write

3. Form Elements
You have a lot of options when it comes to the elements you can include in your forms. Here’s an explanation of some of the more advanced fields:
- Hidden fields – Hide fields from users to submit data to your CRM or another platform. Hidden fields are static so they are not adjusted based on user input.
- Newsletter signup – Users can indicate if they would like to sign up to a newsletter. There are several advanced settings:
- Hidden – This field can be hidden, which is useful if the form is on a subscription page
- Check by Default – Have the checkbox checked by default. This is important especially if the field is hidden.
- Integrations – Integrate with 3rd party email marketing platforms by selecting your vendor and which list you want users added to in your 3rd party vendor. Map the fields in your form to the correct fields in the vendor list. NOTE: You need to setup integrations with vendors first (Tutorial coming soon).

User-Ready Form Templates
Use our ready-made template forms for specific integrations. For example, PayPal Donations for our charity sites. These forms have predefined fields with specific required fields, but you can still adjust some form elements like Placeholder and Label.

Form Options
All form options are optional and are not required to be filled out to publish a fully functional form.

- To – Specify email addresses to which you want completed forms to be sent. The admin of the website is the default email address here.
- CC – Specify email addresses to which you want completed formed to be CC sent.
- Success Message – Customize the message displayed to a user after they complete a form.
- Recatpcha – Activate Google’s recaptcha to reduce spam submissions
- Reject Links – Reduce spam by rejecting any submissions with links in the form
- Active Download – Prompt user to automatically download a file once they complete the form. The file can be added to the page or post where the form will be used. This is done via the right column of the editor. On tablets or mobile devices find this setting below the main content editor.

- Download Message – Insert text to display when a visitor views a page where the download button is displayed instead of the download form. This occurs when the visitor has already filled-out the download form.
Form Tracking
![]()
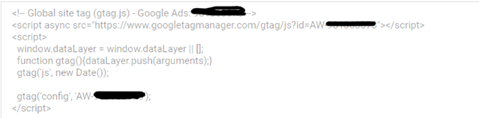
Google Adwords Event Snippet
When you setup Google Ads conversions you are given a snippet of code to copy and paste onto your site where the conversion takes place. For form submissions, you can paste that code in this field and every time a user submits a form, the conversion code will be activated and Google Ads will track that event. Find out more about setting up Google Ads conversion Tracking
Add URL tracking
We cover this advance topic in our tutorial Setting Up Tracking URLs on Forms.
Edit Forms
To navigate to menu options via the left-hand column, go to Forms Forms
To edit a form, scroll over a form and options will appear under the form name.

- Edit – Go to the individual form page to make edits
- Quick Edit – Quickly change the name, date released, add/change password or change the publish status of the form
- Trash – Delete the form
- Duplicate – Make a copy of the form
Conclusion
These might seem like a lot of complicated step to get a form up and running. But rest assured, all you need are the basics to get started. Over time, play around with some of the more complex features and you’ll be a form expert in no time. Forms are incredibly powerful tools for connecting with your users, so investing time and energy in getting them just right will be worth your while.